Knoxville, TN

Ludum Dare 35 “Shifty Shapes” Post-Mortem

May 9, 2016

Here’s a quick rundown of the ups and downs of my compo entry, Shifty Shapes, which was written in Unity. (You can play it on itch.io.)

What went well

Concept

Shifty Shapes

Usually I make some notes about the top themes in each round of voting, but this time I went in cold. (Honestly: I have a few different game ideas floating around in my head right now, so I was open to doing something off-the-cuff.)

Once I decided to go with the “shape” wordplay, I had all of the rules for the game written down within minutes.

The sliding concept was inspired by a board game called Ricochet Robots that I played in analog gaming at Geek Media Expo, plus standard match-3 mechanics which I’d already figured out an algorithm for in Ludum Dare 30.

Animation

I knew I wanted this game to have some nice visual effects, since I envisioned it as one of those shiny mobile puzzle games.

Fortunately, there weren’t a lot of moving pieces in the concept, and I started building the effects early (even before I’d replaced the placeholder art).

Animation is something I don’t tend to think about (or I think about so late in the jam that it’s complicated to implement), but a little bit seems to go a long way.

Bouncing UI elements and blocks/items flying to their respective counts were easy to implement. I feel like my biggest win was making item and score counts only increment when the block/item reached it.

Music

The main riff was based on something I’ve played around with before on guitar–variants of C, with Am and Em thrown in, followed by a quick “bridge.” It worked pretty well, which means I spent about 10 minutes working out the tune, leaving most of Sunday for recording and mixing.

Unity UI

Because I wanted new blocks to fill in like a circular progress bar, I ended up having to mess with Unity UI early (as it supports “filled” images). I’ll confess, it’s something I’ve avoided for the longest time, because it’s intimidating.

Rather than mess around with the large block of numbers that don’t seem to change anything (Unity just recalculates the X and Y positions when you change them), I’ve preferred to stick to world space, Camera.orthographicSize and Camera.aspect, 2D Toolkit, etc.

However, I feel like I’ve made serious progress learning Unity UI thanks to this game. And because I didn’t need to dip into 2D Toolkit for text, I think this is the first Ludum Dare where I’ve had no Asset Store dependencies.

Coding

There are few things more satisfying as a coder than being able to call a “Reset” method after a Game Over screen (as opposed to “screw it, I’ll just reload the scene”).

What didn’t go well

Block pop-in effect

One of my big plans for visual effects was to have blocks “fill in” like a pie chart. That’s actually pretty complicated if you’re using Unity’s Sprites, and I spent more time than I’d like trying to make it work. Once I realized sprite masking was going to require shader code, I gave up on this approach.

Even though I was reluctant to mess with Unity UI, UI Image supported this exact feature, and I got the effect I wanted. However, I wish there was a way to do this via Sprites, and I spent more time than I’d have liked chasing that solution. (Although, I did do this first thing on Friday night so I could budget my time.)

Graphics

I’ve been playing around with Krita recently, and because of some of its pen and paint effects, I initially picked it over GIMP. However, the art I created didn’t feel right–it had a dark, hard-contrast feel.

This wasn’t Krita’s fault, I just wasn’t familiar with it. It was definitely a case of thinking a tool based more on physical mediums would magically produce something “painterly” without me having to understand how it worked. I ended up redoing everything (except the cloud particles) in GIMP, and was pretty satisfied with the result, despite spending a lot of extra time on unused art assets.

Music

Because I guess I have something to prove, I decided to try to mix in cajon, banjo, and mandolin in with guitar. I can’t tell whether it works or whether it’s all out of tune, because my first impression changes each time I listen to it.

I suspect part of the problem is I changed the speed on the guitar part in Audacity, and then tried to increase the pitch by the same percentage to compensate. Also, I’m not enough of a musician to pull this sort of thing off with consistent quality (which is why you’ll note all of the non-guitar tracks are mixed very low and silenced in places).

Build and release

To be fair, it went OK, but this is the first time I’ve been frustrated with myself for not planning in advance.

I always go in building for the default Unity 960×600, only to remember on Sunday afternoon that it’s slightly too large for the LD site’s embed (and even a little awkward in the browser alone). I really need to standardize on a resolution and aspect ratio before I go into a jam. I tend to just jump in the preview window and forget about this part.

Also, given that WebGL builds seem to take somewhat longer than Unity plugin builds did, I need to start planning for this in advance. Luckily, I did a release to itch.io on Saturday, so I was able to iron out some WebGL issues with particle effect sprites early, but it would’ve been stressful if I had waited until Sunday.

2D Platforming Mechanics in Unity

May 1, 2015

Building a platformer has been something of a holy grail for me since I first started tinkering with Unity. I grew up playing NES games like Super Mario Bros., so in some ways platformers are what I think of when I think of video games.

It’s not hard to find third-party utilities to help with this, depending on what level of functionality you want and what price you’re willing to pay.

Eventually, however, you’re going to have to bite the bullet and learn what’s going on inside of the black box. Either your third-party script’s settings are just plain confusing, or you want it to interact with the world in a way it doesn’t intend. (For me, it was trying to build Castlevania II-style stairs.) Even if you don’t roll your own, digging into the guts of a platforming script isn’t exactly straightforward.

The Basics

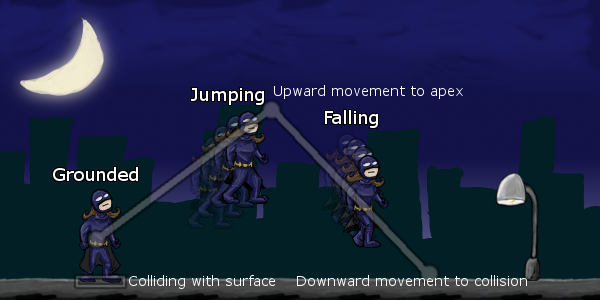
A basic platformer is going to have three mutually exclusive states at a minimum: Grounded, Jumping, and Falling.

unity-platforming-jumping-statesGrounded is what the user perceives as the “default” state. In reality, it’s the state that the character is in only when its lower edge is colliding with a surface. Typically, a player can only jump when they’re in a grounded state (or, in the case of double jumping, the jump limit would be reset as soon as the character is grounded again).

Jumping is the state where a character is moving upwards into the air. It’s an active state–that is, it’s usually triggered by player or AI intervention, not simply interaction with environment like Grounded or Falling. It’s also a temporary, limited state which ends when a maximum height is reached or a timer is up.

Jumping can also end abruptly due to collision. If the character hits their head–that is, their upper edge collides with a surface, the opposite of the check done for grounded–it’s naturally expected that the player immediately start falling.

In games where the player has more control over their character, jumping can end early if the player releases the jump button. This allows for both quick, short jumps and long, floatier jumps.

Falling is actually the character’s “default” state–when they’re neither in a jump nor colliding with the ground. When falling, the character is affected by gravity. Falling ends when the character becomes grounded again, based on collisions with their lower edge.

Thinking in frames

While it may not seem obvious, there are only a few possible state transitions in a typical platformer. You can’t go directly from Jumping to Grounded without encountering a case that would trigger Falling. You can’t go from Falling to Jumping without first encountering a case that would trigger Grounded. Because you can rule out certain state transitions, you can simplify your logic.

I say this isn’t obvious because I’ve never been a hardcore twitch-gamer who can pick out specific frames of animation. To me, playing a Mario Bros. game is a smooth experience–I take in the “big picture,” so to speak. In reality, it’s a series of very tiny moments where the computer is performing very tiny updates and then making decisions based upon them.

This is tricky because it’s easy to work out a “good enough” platformer controller that fails in odd situations if you don’t consider this frame-to-frame precision. For example, 99% of the time the character might behave correctly–but if you end up off by just a fraction, you’ll get weird behaviors. Precision is possible–you just have to figure out how to make it work. One tip is to be aware of Unity’s lifecycle.

Testing for state changes

So how do we detect when the player changes states?

As a Unity newbie, my first attempted solution was to detect collisions with the ground or other platforms using colliders. This isn’t a bad instinct. Colliders take the hard work out of hit detection by turning them into events. You don’t have to constantly check for a state–you simply need to respond to enter, stay, and exit events.

unity-platforming-colliderFor detecting Grounded/Falling states, this can actually be a pain. Each collision is handled as a discrete event, so you don’t know if that OnCollisionExit event means you’re actually grounded or not because that collider doesn’t know whether other colliders are triggering OnCollisionStay and OnCollisionEnter events. Technically, it should be possible to track this, but that’s a lot of bookkeeping, and it’s highly dependent upon the order the events are called in (relative to the Unity lifecycle).

Not to mention that it’s hard to get an accurate picture of which direction a collision came from without multiple colliders. That means it’s not easy to differentiate running into a wall (or an enemy) from hitting the ground. Believe me, I’ve tried testing the collision relative velocity, and I’ve never felt like I could rule out all the false positives.

Raycasting

Unity has various physics casting functions (some which, I suppose, aren’t technically raycasting) that all do variants of the same thing: they test a specified area for colliders.

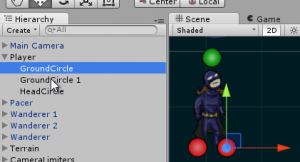
unity-platforming-raycastpointsCurrently, I tend to lean on Physics2D.OverlapCircleAll, which returns all colliders within a given radius of a point. It returns a set of Collider2D objects which can be used to determine whether any ground layers are hit.

I attach a couple of empty GameObjects as test points, which I then pass into my controller script. For example, in the screenshot here I use two ground and one head (highlighted with red and green icons respectively). Add as many as you need based on the size of your cast area–you want to avoid any case where a character could technically be over a walkable object without returning a raycast hit.

In my last Ludum Dare game, I used something like this:

var colliders = Physics2D.OverlapCircleAll(transform.position, 0.1f,
     LayerMask.GetMask("Terrain"));
// Test colliders to see if there are any ground objects

You call this each Update or FixedUpdate, depending on how you’re adjusting your physics. Test for grounded (or whether a character hits their head in a jump) before you do anything else, because it’s going to determine what state transitions you allow, what movement you apply to the character, and what you allow the player or AI to do. (That is, the character must react to the environment before they can react to the player or AI’s input.)

Let me give a disclaimer: I really need to work out a better approach. I suspect there’s some issues with my circular cast not lining up perfectly with my character’s box collider, and there’s probably a more performant approach than returning all collisions. Still, this should be a good starting point, although I encourage you to try out some of the other methods in Physics2D (or Physics, if you’re using 3D colliders) that may work better for your particular setup.

Admittedly, tinkering is difficult. This stuff is happening at such small intervals, sometimes at varied points in the Unity lifecycle (Update vs. FixedUpdate vs. LateUpdate vs. coroutines). And you can’t easily visualize it without writing your own editor gizmo code. As a newbie, I’ve found there’s a certain level of blind trust (sometimes misplaced) involved.

This is also a case where setting up your physics layers matters: if you do it right, you should minimize the amount of “testing” you have to do with the results.

Note that while I’m using raycasting to determine the player’s overall state, I’m also relying heavily on Unity’s physics and hit detection to handle movement. There’s still a collider on my player character and it still blocks movement when it comes into contact with something.

I use OverlapCircle because I don’t really care how far the character is from the ground, only that it’s near enough to a surface to register as touching. If I didn’t have a collider attached to the character, I’d want to know exactly how far the closest ground object was so that I could adjust falling speed so as not to overshoot.

Speaking of which, that brings us to…

Movement

There are a couple of ways you can handle movement in Unity. For the most part, you should technically be able to get similar results with any of these, assuming you can figure out how.

The approach you take determines how much of Unity’s built-in features you can use (versus how much you have to write yourself) and what mode you’ll have to think in.

You can set an object’s transform position directly. This is sort of a brute-force approach. Triggers and colliders will still fire, but you don’t have the benefit of continuous collision mode, unless you code it yourself. In mathematical terms, this means you have to think about position at a given time, or f(x). (Realistically, you’ll probably be working out speed/velocity, or f'(x), and applying it.)

You can set a Rigidbody’s velocity directly. This is my preferred approach, because it means I don’t have to think too much about physics, but I still get the benefit of the physics system adjusting for collisions. In mathematical terms, this means you’re only working with the player’s velocity at a given time, or f'(x).

Typically, I set Rigidbody velocity in FixedUpdate as long as there’s a change in velocity required from the last FixedUpdate call. I set drag and gravity scale to 0, because I don’t want anything else tinkering with velocity if I can help it. Because Unity velocity represents units per second, it’s possible to use Time.fixedDeltaTime to work out just what velocity needs to be.

Note that one reason I like using Unity’s built-in physics and hit detection is I have to think less about exact collision positions. I’ve seen platformer controllers that don’t require colliders, but that means you have to think about not just the character’s current speed, but the distance to the nearest object. This isn’t impossible, but it’s an extra layer of complexity I’d prefer to get into only if necessary.

You can apply force to a Rigidbody. This takes full advantage of Unity’s physics, but it requires a little more work. You’re not only going to have to determine what force you will apply, but you’ll have to tweak the object’s gravity scale, mass, and drag to get it feeling right. In mathematical terms, you’re indirectly working with acceleration, or f”(x).

I’d avoid this on the player character, because you want those controls to feel tight, which is harder to figure out with several degrees of separation between your code and the character’s actual movement speed.

In a later post, I’ll get into more of the math behind movement, since that’s the difference between a clunky game and a smooth one. (I will say that I find Microsoft Mathematics incredibly useful for this sort of thing, since you can easily plot changes in speed or position over time.)

Ludum Dare 32 Post-Mortem

April 30, 2015

Here’s the usual post-mortem run-down for Ludum Dare 32: Lightbender. I usually do “What Went Right” and “What Went Wrong,” but there are elements of both in most of these categories.

Continue reading

Ludum Dare 32 entry: Lightbender

April 26, 2015

The theme was “An Unconventional Weapon,” so I built a platformer where you are a superhero who can imbue lights with special properties to defeat enemies.

LudumDare32-dylanwolf

Ludum Dare 31 entry: Ice Fishing Derby

December 7, 2014

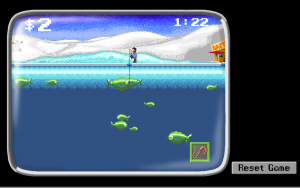
The theme was “Entire Game on One Screen,” so I did a game inspired by Fishing Derby on the Atari (which was also played on a single screen–it didn’t even have a title screen!)

IceFishingDerby1

Writing a Match-3 game in Unity

August 30, 2014
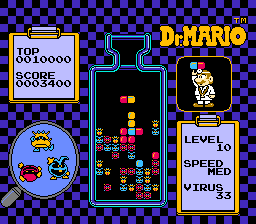
Dr. Mario (source: Wikipedia)

Dr. Mario (source: Wikipedia)

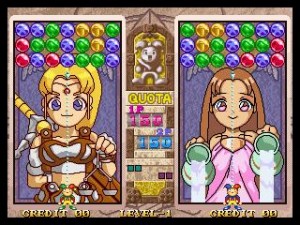
This year in SeishunCon‘s digital gaming room, I was reintroduced to the match-3 game. I’d played Dr. Mario when I was younger, but more competitive games like Magical DropBust-A-Move, and Tokimeki Memorial Taisen Puzzle-Dama were something very different.

Ultimately, I realized just how many more-or-less neutral decisions are involved in making a match-3 game.

During this year’s Ludum Dare, I decided to jump in head-first. I did a bit of a warm-up the week before, trying to build a Tetris-style algorithm that detected and cleared out lines. This tutorial from Unity Plus was a huge help. Of course, the Tetris matching algorithm–a complete row of tiles–is much simpler than an algorithm that picks out irregularly shaped patches of matching tiles.

If you want to see all of these code samples in context, check out my Ludum Dare 30 repo.

Two worlds

Magical Drop 3 (source: Kazuya_UK)

Magical Drop 3 (source: Kazuya_UK)

The trickiest part of building a puzzle game in Unity is that the game itself doesn’t live in world space. Not fully, anyway.

This isn’t as true in other genres. Platformers, for example, live almost exclusively in the Unity game world. The player’s Transform tells you its location. Colliders (or, in some cases, raycasts) tell you when the player is on the ground, hitting the ceiling, or colliding with an enemy. Even if you aren’t using in-game physics, you’re probably adding force or setting velocity on a Rigidbody so that you get collision detection for free.

Not so with a puzzle game. If your game involves clicking, you might get some coordinates in world space, but you’re probably going to convert that to a cell in a grid that lives entirely in code. There’s a good reason for that–it’s far easier to write the logic for scoring a game like Tetris or Dr. Mario when you’re thinking about blocks or tiles, not individual pixels.

I'm pretty sure this is not how Tetris is supposed to work.

I’m pretty sure Tetris blocks are not supposed to stick to the side of the board.

My warm-up actually tried to live in world space as much as possible. It used physics to determine when a tile had landed, and only transferred data back to a two-dimensional array to detect row completion. That seemed safer–what happens in the game world is real, after all. It’s what the player sees, so if you store your data there, there’s no fear of getting out of sync, right?

I was wrong. No matter how I tweaked it, it never did work right.

The Unity Plus tutorial I linked above was a huge help. If nothing else, it allowed me to trust that moving my logic fully out of the game world and into an abstract data structure was a valid approach. If you haven’t already, go back and at least skim it, because I intend this post to be an extension from Tetris logic into match-3 logic.

Converting from board to world space

Once I figured out this transition was manageable, this part was easy. I created a GameTile class that tracked the color, row, and column of the tile, and updated the tile’s position based on that. Here’s an abridged version:

public class GameTile : MonoBehaviour {

 private Transform _t;
 private SpriteRenderer _s;

 [System.NonSerialized]
 public int TileColor;

 [System.NonSerialized]
 public int Row;

 [System.NonSerialized]
 public int Column;
 
 void Awake () {
   _t = GetComponent<Transform>();
   _s = GetComponent<SpriteRenderer>();
 }

 Vector3 tmpPos;
 public void UpdatePosition()
 {
   tmpPos = _t.position;
   tmpPos.x = (Column * Board.TileSize) - Board.WorldOffset;
   tmpPos.y = (Row * Board.TileSize) - Board.WorldOffset;
   _t.position = tmpPos;
 
   _s.sprite = Board.Current.Textures[TileColor];
 }
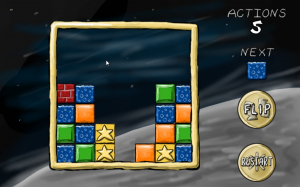
Tiles in a grid

Tiles in a grid

Note that, in this case, TileSize is a constant that represents the size of a tile in Unity units. I’m using 64×64 pixel tiles, and the sprite size in unity is 100 pixels per unit, so TileSize works out to 0.64. I’m also using a constant offset so that the middle of the 7×7 board is at 0,0 world space, and the lower-left corner is tile 0, 0 in game space.

I also created an array that represents the gameboard as a static field in a class called Board. (Board started off as a static class and became a singleton because I needed to set some values in-editor, so it’s clumsily straddling the worlds of game object and static class.)

 public const float TileSize = 0.64f;
 public const float WorldOffset = 1.92f;

 public const int BoardSize = 7;
 public static GameTile[,] Tiles = new GameTile[BoardSize, BoardSize];

While the Unity Plus tutorial used a two-dimensional array of integers, I decided to store references to my GameTile objects in this array. This allowed me to pass data to and from tiles directly and (as we’ll see later) made tile-clearing and animation generally easier.

Whenever I made a change to board state, it meant that I could simply loop through the board array and tell each tile where it was supposed to be:

 public static void UpdateIndexes(bool updatePositions)
 {
   for (int y = 0; y < BoardSize; y++)
   {
     for (int x = 0; x < BoardSize; x++)
     {
       if (Tiles[x,y] != null)
       {
         Tiles[x, y].Row = y;
         Tiles[x, y].Column = x;
         if (updatePositions)
           Tiles[x, y].UpdatePosition();
       }
     }
   }
 }

Note that in every case, we’re always converting from abstract game space into world space. Unity game objects aren’t storing the important game state information directly; they’re always a representation of that state.

… and back again

In my game, there was one case where I needed to convert from world to game space, and that’s when the user clicked an empty space to drop a tile. To do this, I simply created a large collider behind the entire gameboard with this script attached:

 void OnMouseDown()
 {
   if (GameState.Mode == GameState.GameMode.Playing)
   {
     mouseClick = Camera.main.ScreenToWorldPoint(Input.mousePosition);
     mouseX = (int)Mathf.Round ((mouseClick.x + WorldOffset) / TileSize);
     mouseY = (int)Mathf.Round ((mouseClick.y + WorldOffset) / TileSize);
     PutNextTile(mouseX, mouseY);
     Soundboard.PlayDrop();
     GameState.ActionsTaken++;
   }
 }

That’s really all there is to it. Note that it’s basically the reverse of UpdatePosition() above, which converts from game to world space.

Detecting and clearing matches
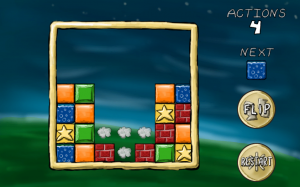
Clearing matches

Clearing matches

This is the trickiest part. Actually, this is probably why you’re reading this blog post.

Horizontal matching (as in Tetris) is pretty easy–you just need to look for contiguous tiles in the same row. Even allowing horizontal or vertical matches (as in Dr. Mario) is just a variation on this theme. However, trying to track a set of contiguous tiles that can vary horizontally and vertically is going to take some recursion.

Each time we take an action that changes the board, we’ll trigger a check. The first thing we do is copy our entire board array into another array:

 static void CopyBoard(GameTile[,] source, GameTile[,] destination)
 {
   for (int y = 0; y < BoardSize; y++)
   {
     for (int x = 0; x < BoardSize; x++)
     {
       destination[x, y] = source[x, y];
     }
   }
 }

 static bool clearedTiles = false;
 public static void MatchAndClear(GameTile[,] board)
 {
   clearedTiles = false;
   // Make a copy of the board to test
   CopyBoard(board, toTest);

//... continued...

Why? We’ll see later that it makes it much easier to tell which tiles we’ve checked.

We start the process with a brute-force approach. We’ll go cell-by-cell (first rows, then columns), testing each cell. For each test, we’ll reset some variables we use to track our testing, and then call a separate function (which we’ll later use for recursion):

// Continued from MatchAndClear() above...

   currentTile = null;
   collector.Clear ();

   for (int y = 0; y < BoardSize; y++)
   {
     for (int x = 0; x < BoardSize; x++)
     {
        TestTile (x, y);

// Continued later...

Let’s take a look at that TestTile function:

 static void TestTile(int x, int y)
 {
   // Tile already tested; skip
   if (toTest[x,y] == null)
   {
     return;
   }
   // Start testing a block
   if (currentTile == null)
   {
     currentTile = toTest[x, y];
     toTest[x, y] = null;
     collector.Add(currentTile);
   }

// ** Skipped lines--we'll come back to these later **

 // If we're processing this tile, test all tiles around it
   if (x > 0)
     TestTile(x - 1, y);
   if (y > 0)
     TestTile(x, y - 1);
   if (x < Board.BoardSize - 1)
     TestTile(x + 1, y);
   if (y < Board.BoardSize - 1)
     TestTile(x, y + 1);
 }

If this function finds that the cell is null, then we skip it. A null cell means that it’s either empty, or we’ve already tested it. (That’s why we copied it into a separate array–we can manipulate the new array at will.).

If the cell has a value, though, we’ll do a few things. First, we’ll remember it as our “current” cell–the one at the top of the chain of recursion. Then, we’ll remove it from our copy of the gameboard so that we don’t test it twice. We’ll also add it to a List so we can remember how many contiguous tiles of the same color we’ve found.

There’s two other conditions we might run into later in the recursion, but we’ll talk about them later. Once we’ve tested a cell, we’ll then grab the four cells around them an run them through the same test.

The “current” cell is now set, indicating this isn’t our first level of recursion. On these function calls, we now have three possibilities for each cell.

First, the cell could be null, which again means we’ve already tested it or it’s empty. Again, we’ll do nothing if that’s the case.

Second, the cell could not match the “current” cell. In that case, we don’t consider it “tested.” Our recursion tests for a single set of contiguous tiles of a single color. Just because this tile isn’t part of the current set doesn’t mean it’s not part of a different one.

// From TestTile() above... 

 // Tile doesn't match; skip
 else if (currentTile.TileColor != toTest[x, y].TileColor)
 {
   return;
 }

Third, the cell could be the same color as our “current” cell. If that’s the case, it’s been “tested,” so we’ll set it to null in our copy of the board. We’ll also add it to that List we use as an accumulator. This is one of the conditions we skipped in the example above:

// From TestTile() above... 

 // Tile matches
 else
 {
   collector.Add(toTest[x, y]);
   toTest[x, y] = null;
 }

The function will continue recursing until it’s exhausted all options, either by hitting an empty cell or the edge of the board. At that point, we return to the main “brute force” loop to handle our results.

If our accumulator has more than three tiles, then this was a successful match. If not, then we’ve tested one or two tiles, but we don’t need to take action:

// Continued from MatchAndClear() above...

       if (collector.Count >= 3)
       {
         foreach (GameTile tile in collector)
         {
           ClearTile(tile.Column, tile.Row);
           clearedTiles = true;
           Soundboard.PlayClear();
         }
       }
       currentTile = null;
       collector.Clear ();
     }
   }

   if (clearedTiles)
   {
     SettleBlocks(board)
   }
 }

Here, as we’ll discuss later, I’m simply triggering some animations. The simplest approach, though, is to loop through our accumulator and call DestroyObject on each matching tile’s game object. That kills two birds with one stone: the in-game objects are gone, and the cells in our board state are set to null.

Dropping tiles
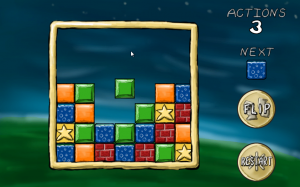
Dropping a tile

Dropping a tile

Certain changes–dropping a tile or clearing tiles, in this case–can leave unsupported tiles which must be resolved (if those are the rules of our puzzle game, of course). This is actually a really simple algorithm.

We’ll go column-by-column this time, then row-by-row. The order is important here.

In each column, we’ll work our way up from the bottom until we find an empty cell. Then, we’ll make a note of that cell. The next time we find a tile, we’ll simply shift it down to that location and add one to our “empty cell” index:

 static int? firstEmpty;
 public static void SettleBlocks(GameTile[,] board)
 {
   for (int x = 0; x < BoardSize; x++)
   {
     firstEmpty = null;
     for (int y = 0; y < BoardSize; y++)
     {
       if (board[x, y] == null && !firstEmpty.HasValue)
       {
         firstEmpty = y;
       }
       else if (firstEmpty.HasValue && board[x, y] != null)
       {
         board[x, firstEmpty.Value] = board[x, y];
         board[x, y] = null;
         firstEmpty++;
       }
     }
   }
   UpdateIndexes(false);
 }

When you’re done, don’t forget to call your matching function again. It’s entirely likely that dropping tiles has created some empty rows.

In fact, if we were scoring points, this would make it easy to award combo bonuses or multipliers. All of these repetitions of dropping and clearing blocks are just recursions of that first call that was triggered by a player action. We could tell both how many total matches resulted from a player action, and how many levels of “chaining” were required for each action.

Animations

This is a working game, but it’s not intuitive, primarily because we have no animations. Tiles disappear, then reappear on lower rows. It’s hard to figure out what’s really going on unless you’re watching closely.

This is tricky to do. Game objects are always a representation of game state, so our tiles are always laid out on a grid. Tiles are always in one space or another; so a tile might be in row 1 or row 2, but it’s never in row 1.5.

What’s the trick? We should never be manipulating the game board and animating at the same time. Think about how Tetris or Dr. Mario work–you don’t drop the next tile until everything has had a chance to settle. This gives a brief reprieve for the player, but it also ensure we don’t have any weird race conditions or interactions.

As an aside, I recommend creating a “game state” enumeration whenever you start a new project. I’ve never written a game where I didn’t need to know whether the game was in play, paused, showing a menu, in dialogue… I could go on. Best to plan for it early–that way you can ensure that every line of code you write tests that it should be running in this state.

Admittedly, my implementation is kludgy, but here’s the basic idea–when we clear or drop a tile, we trigger a state change. Each GameTile object knows how to handle this state change, and (more importantly) it knows when to tell the gameboard that it’s finished with its animation:

 void Update () {
   if (GameState.Mode == GameState.GameMode.Falling && Row != LastRow)
   {
     targetY = (Row * Board.TileSize) - Board.WorldOffset;

     tmpPos = _t.position;
     tmpPos.y -= FallSpeed * Time.deltaTime;
     if (tmpPos.y <= targetY)
     {
       Board.fallingBlocks.Remove(this);
       UpdatePosition();
       Soundboard.PlayDrop();
     }
   }
 }

When a clear animation finishes, the game needs to check if it should be dropping tiles:

 private static float timer;
 private const float DisappearTimer = 0.667f;
 void Update()
 {
   if (GameState.Mode == GameState.GameMode.Disappearing)
   {
     timer -= Time.deltaTime;
     if (timer <= 0)
     {
       GameState.Mode = GameState.GameMode.Playing;
       SettleBlocks(Tiles);
     }
   }

When the drop animation finishes, it needs to check for matches:

   if (GameState.Mode == GameState.GameMode.Falling && fallingBlocks.Count == 0)
   {
     GameState.Mode = GameState.GameMode.Playing;
     MatchAndClear(Tiles);
   }
 }

This cycle repeats until we finally don’t have any more matches, and then the game can go back to doing its thing.
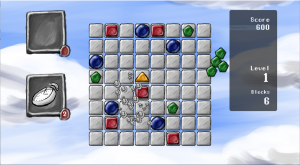
Ludum Dare 30 Post-Mortem

August 28, 2014

Ludum Dare 30 entryWhat went right:

I felt like the scope was perfect for the limited amount of time I had this weekend. This was mostly luck, but I also knew when to quit tweaking and didn’t regret it.

The match-3 and block-dropping algorithms fell into place like magic. To be fair, I’d given it some forethought–I did a quick Unity refresher on Wednesday where I attempted to build the line-clearing mechanic of Tetris with help from this tutorial. However, that’s a much simpler algorithm and I didn’t have an exact plan. It was a leap of faith that paid off early, leaving all of Sunday for polish. (I’d probably remiss if I didn’t mention that the match-3 concept was inspired by the time I spent in SeishunCon‘s digital gaming room this year.)

I’m happy with the art. I didn’t stretch myself stylistically, and it’s not as crisp and detailed as what I’d hoped, but overall it feels pretty slick if you don’t look too closely. I love posting those screenshots because it feels like a “real” game (well, at least to me).

As in the past, adding a GVerb track covers over a multitude of recording sins. I’m going to say this a lot in this post, but this feels like cheating.

Driving 40 minutes back from the Knoxville Game Design meetup is always a good way to start thinking about design and algorithms.

What could have gone better:

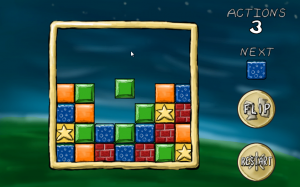
Tiles in a grid

I basically shoehorned a puzzle game into the theme. This was premeditated, mainly because I was itching to dip my toe into the genre. It restrained the scope by removing the need for level design, which helped. However, it also felt like cheating the system to start thinking about a game genre so early (especially since I feel like my LD29 entry was a much stronger “Connected Worlds” concept).

Overall gameplay was good, but not great. I’m happy with this in one sense–I didn’t make a ton of explicit design decisions, so I won the “go with whatever’s easiest” lottery. Still, I feel like the “flip or drop” choice is missing something. I enjoy the game, but I restart as soon as I clear out all of the obvious flip combos. Once I have to drop blocks, it’s like I’ve failed. I feel like a “flip or shift” mechanic would have been better.

What went wrong:

Because I wasn’t livestreaming, I tried to do a status update video on Friday night. OpenBroadcaster doesn’t work smoothly on my laptop. I wasted about an hour or so tinkering with OBS on a night I ended up staying up until 4am.

I don’t understand music. Originally, I picked the current chord progression as a base, then played some random notes over it on a second track. Seemed clever on Saturday, but on Sunday I realized it was too chaotic. After talking to Mike at the post-LD meetup, I think I need to study up on some music theory basics rather than hoping a clever experiment will pay off. (I feel like I’m reusing the same chord progressions and I always use a similar rhythm/picking pattern.)

Overall, I don’t feel like I stretched myself like I should have. I stick to the same style musically and artistically because I don’t have a lot of range. I stick to Unity because it’s all I know. To be honest, I’ve had a few good ratings in past LDs, so I avoid the unfamiliar because I want to keep that up. Next LD where I have the time, I need to set a few goals–for example, use Inkscape instead of GIMP, or use a digital tool like PxTone or Bfxr.

Ludum Dare 30 entry: Parallel Puzzles

August 25, 2014

The theme this time was “Connected Worlds,” and I decided I wanted to try writing a match-3 style puzzle game.

Ludum Dare 30 entry

Prototyping a card game with nanDECK, part 3

August 12, 2014

In part 1, I covered why you might want to use nanDECK in prototyping a card game, and in part 2, I covered how to build a basic template.

Now, let’s look at some of the directives I used to build my Encounter deck template. In this case, I’m still using the Title, Description, and Count fields, but I’ve also added Life and Cards fields:

nanDECK Spreadsheet

Again, note that some cards intentionally leave these columns blank. I wanted to add some immediately resolved effects that should be distinguished from “standard” Encounters that remain in play until handled.

Using variables

In the simple example, we created a variable called [all] to save us from having to redefine our range in every directive. This was really a bit of lampshading on my part, because the syntax for “all cards in this spreadsheet” isn’t really clear. There are other reasons you might want to use them, though.

Let’s say we have a lot of text blocks on our card, that all stretch the entire length of the card. Rather than hard-coding the width value in every directive, we can reuse it as a variable:

[text_width]=4.58
font="arial",16,"",#000000
text=[all],[Title],0.25,0.25,[text_width],1,"left","top"

Note that we could define our margins the same way if we wanted. In this case, it’s just easier to type out “0.25” than to write “[marginx]” every time and (these being prototypes) I don’t envision I’ll be tweaking layout much.

Conditional blocks

As I said earlier, I want to have two types of Encounter cards–“standard” Encounters with numeric stats, and Encounter cards that trigger effects when flipped. While I could separate these into different spreadsheets or create ranges in my script, that’s a huge hassle–I’m using nanDECK because I don’t want to have to micromanage my spreadsheets.

In this case, I want to use a conditional:

nanDECK conditionals

Let’s look at this conditional step-by-step. The first part starts out relatively simple–almost like what I covered in part 2:

[all]=1-{(Title)}
linkmulti=Count
link=fog-encounters-update20140719.csv
cardsize=5.08,8.89
page=21.59,27.94,LANDSCAPE,HVEO,#FFFFFF,[all]
[text_width]=4.58
font="arial",16,"",#000000
text=[all],[Title],0.25,0.25,[text_width],1,"left","top"
font="arial",12,"",#000000

We end by changing the font, but we don’t follow it up with a “text” directive that prints any text. Note that “font” and “text” directives don’t have to be back-to-back. nanDECK will remember the last “font” you specified.

Here’s where the logic happens. We want to check if “Cards” (one of the two stats that our “standard” Encounters will have) is empty. If it is, we just want to show the description. If it isn’t, we want to show all our numeric stats ahead of the description.

We start our block as follows, checking to see whether “Cards” is not a blank string of text.

if=[Cards]<>""

nanDECK’s “if=” seems a bit bizarre if you’re used to writing code, but remember, everything is a directive.

To explain the rest of this jumble of punctuation, note that Cards is encased in [brackets] to denote it’s a column in our spreadsheet, the “<>” operator means “is not equal to”, and the empty quotes (“”) refer to an empty string of text.

(Note that I’m not testing all of my stat columns here, but I could if my requirements were different. If you use one stat, you’re going to use both of them. )

What comes next is indented for readability, but this isn’t nanDECK’s requirement. Once it encounters that “if” directive, everything that follows will be executed only if it’s true. nanDECK is looking for an “else” or “elseif” directive.

Here we have more numbers, but if you remember part 2, you should be able to decipher this.

text=[all],"Cards:",0.25,1.25,2,1,"left","top"
text=[all],"Life:",0.25,2.25,2,1,"left","top"

We start out by creating labels for our numeric values, setting them along the left margin (0.25cm left) and 1cm apart from each other vertically (at 1.25cm and 2.25cm). Because the labels are small, we allow 2cm width.

 text=[all],[Cards],2.25,1.25,2,1,"left","top"
 text=[all],[Life],2.25,2.25,2,1,"left","top"

Next, we fill in the values. Because we’ve already reserved 2cm of width from the label, we set them at 2.25cm left, giving ourselves a bit of a margin. Since they’re on the same lines as the labels, our vertical values are the same. We’ll also allow 2cm here because numeric values will be short.

htmltext=[all],[Effect],0.25,3,[text_width],5.39

Finally, we display the Description as HTML just below the last numeric stat, and have it fill the rest of the space on the card.

Now, let’s handle what happens if we don’t have a value for [Cards]:

else
    htmltext=[all],[Effect],0.25,1,[text_width],7.39
endif

“Else” tells nanDECK that we want to switch, and handle the opposite case–what should happen if Cards does not have a value. (Note that you don’t have to have an “else” directive for every “if”.) In this case, we want to display the Description starting at the top of the card.

We finish off the block with an “endif” directive, which simply tells nanDECK that we’ve ended the “if” block.

This is, admittedly, a simple example–you can, for example, nest “if” blocks inside of each other, or use “elseif” directives to define multiple conditions.

This should be enough to get you started if you’re interested in using nanDECK. Remember, if you want to dive in to nanDECK, the manual will be your most valuable asset. It’s not always perfect, but it does cover every directive.


Prototyping a card game with nanDECK, part 2

August 10, 2014

In part 1, I covered why you might want to use nanDECK in prototyping a card game. Now, let’s get into the nuts and bolts of building a template.

A simple example

In my last post, I mentioned that Player Actions were simple title-and-description cards. In fact, that’s all that’s really in my spreadsheet: Title, Description, and Count (for the number of copies of each card in the deck). Note that I’ve also got a calculated field in my spreadsheet showing the total number of cards in the deck–in this case, 86.

Player Actions CSV

“Description” belies some complexity: I want to be able to include line breaks and, if possible, formatted text.

Of course, there’s the game design equivalent of a “code smell” here–if I’m regularly using the same mechanics over and over, then I probably need to introduce some keywords. And if I’m introducing multiple keywords, then maybe that needs to be its own column in my CSV, rather than a bold term that appears in the Description.

For example, my Action deck has a few cards that players can keep for semi-permanent effects, so why write out “players can keep this, can only have one copy, etc. etc.” on every card? Applying the label “Item” would be far simpler, and then refer the player to the rulebook.

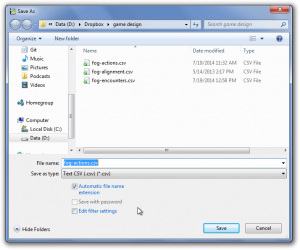
Once we’ve got a spreadsheet set up in Excel or OpenOffice, we need it in a text format that nanDECK can read. To do this, go to Save As… and select either “Comma separated values” or “CSV.” Don’t worry too much about options, as the defaults will work for most scenarios–just make sure that the delimiter is CSV.

Save as CSV

Now, let’s take a look at the configuration I’m using for this deck. Note that every directive from this section is explained in the nanDECK manual. If you want to follow along, you can download the .nde file here (you’ll need to provide your own CSV file with Title, Description, and Count columns.)

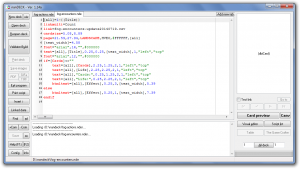
nanDECK simple example

Building a template in nanDECK is somewhere between creating a configuration file, programming, and writing HTML. Every line starts with a directive (the text on the left side of the equals sign) that is passed a number of values (the list, separated by commas, on the right side of the equals sign).

Order is sometimes important, and you can create conditional blocks, but there’s typically not the sort of “flow control” you think of when programming. (Again, if your layout is getting that complex, you’re probably out of the prototyping stage anyway.)

First, we’ll set up a variable called [all], which will represent all cards in the set. The line below might be best read as “[all] represents a set of cards starting at 1 and ending with the last row that has a Title value.” (I’ve never found a reason not to do this. Multiple card formats probably should be stored in separate layouts and spreadsheets.)

[all]=1-{(Title)}

Next, we tell nanDECK that the “Count” field in our spreadsheet represents the number of copies of each card:

linkmulti=Count

We also tell nanDECK where to find that spreadsheet. In this case, we assume that we’re storing the CSV in the same folder as our nanDECK NDE file:

link=fog-actions-update20140719.csv

Next, we want to define the size of each card. nanDECK will use this to lay out our cards.

cardsize=5.08,8.89

I know what you’re thinking: those numbers look odd. That’s because nanDECK uses  centimeters, not inches. (Yes, it’s a hassle, but Google will easily do these translations for you.) We’re just talking about a normal 2″ x 3.5″ business card here: width first, then height.

We also need to tell nanDECK what size paper we’re using:

page=21.59,27.94,LANDSCAPE,HVEO,#FFFFFF,[all]

That’s a lot of parameters, but nanDECK should give us some hints (though we’ll really need to refer back to the manual on what it means):

nanDECK hints

Again, the first two parameters are in centimeters. We’re just telling nanDECK that our page is 8.5″ wide (21.58cm) by 11″ tall (27.94cm), in landscape mode, centered vertically and horizontally (the HV), has no printed guides on either odd or even pages (the EO), is white, and should be used for all cards in the set.

That’s a mouthful, but remember: if we stick with one type of paper for all our card prototyping, we can copy and paste this into every template without having to think about it.

Next, let’s actually write some text:

font="arial",16,"",#000000
text=[all],[Title],0.25,0.25,4.58,1,"left","top"

We’re telling nanDECK to use 16 point black Arial for whatever follows this TEXT directive. Then, we’re creating a text block on all cards in the set, with the Title value for each card printed out in the text block. Our text block should be indented 0.25cm from the top and left side of the card, and be 4.58cm wide by 1cm tall. (4.58cm + 0.25cm margins = 5.08cm wide card)

Note that we are defining the size of the text block, not just its position, which means it may get cut off. We’ll want to double check our layout against our card set before we actually print to make sure this doesn’t happen. (Typically, I print to PDF from nanDECK, review the PDF, and then print from there.)

To print the description, we do something similar:

font="arial",12,"",#000000
htmltext=[all],[Description],0.25,1,4.58,7.64

This time, we’re telling nanDECK that our text block containing the Description value for each card should be formatted as HTML. That means our <br/> tags will be interpreted as line breaks, and we can use <b> or <i> to format certain bits of text.

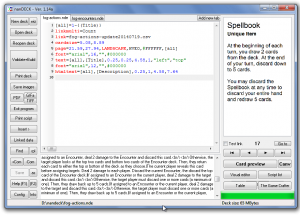
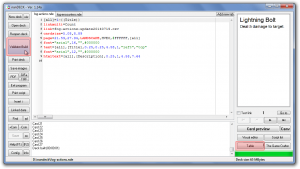
That’s all there is to it. If we type this into a nanDECK tab and click “Validate+Build,” we should see our cards to the right. We can then click “Table” to actually flip through our cards, ensuring that the randomization “feels” right.

The nanDECK Validate+Build and Table buttons

The nanDECK Validate+Build and Table buttons

In the next post, we’ll get into conditional formatting.

(Continued in part 3.)

×